4. Demonstration
Now let's take a look at the result of this project.
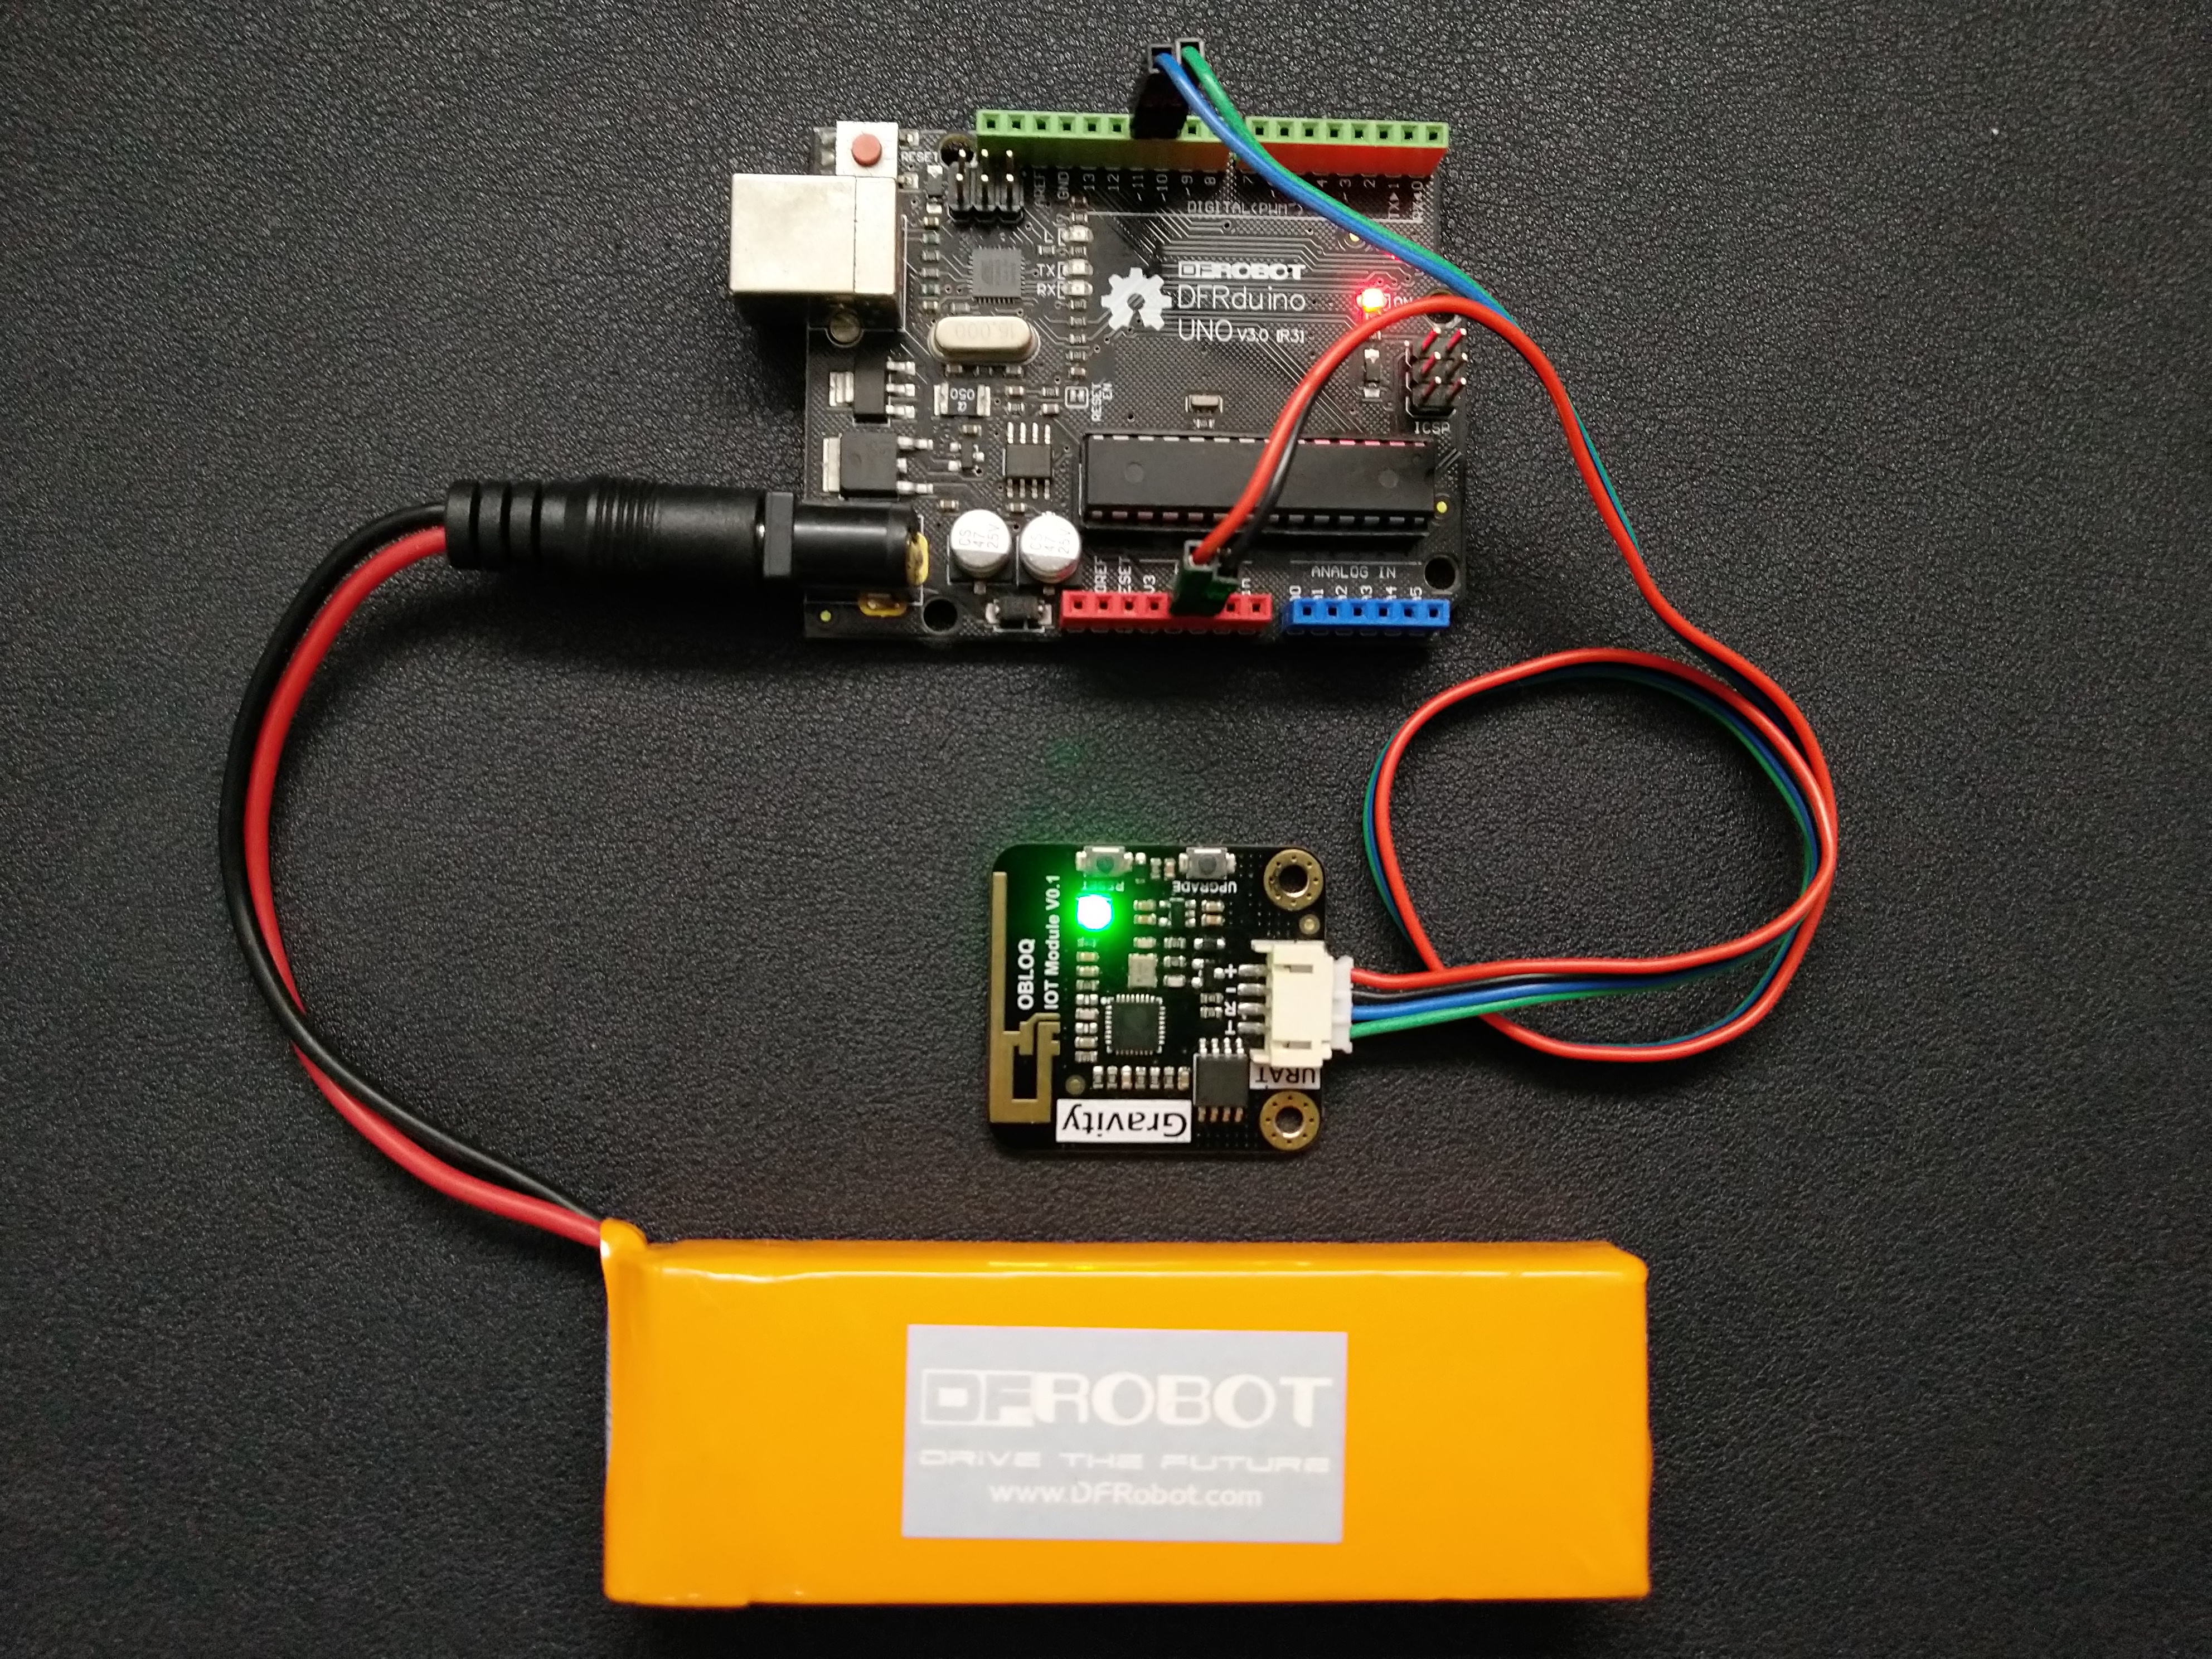
- Keep all hardware and devices power on. When OBLOQ module operates normally, its LED (signal light) shows green and is always on.
- Login to iot.dfrobot.com.cn, enter Workshop, check if the operating device has been registered on IoT website.
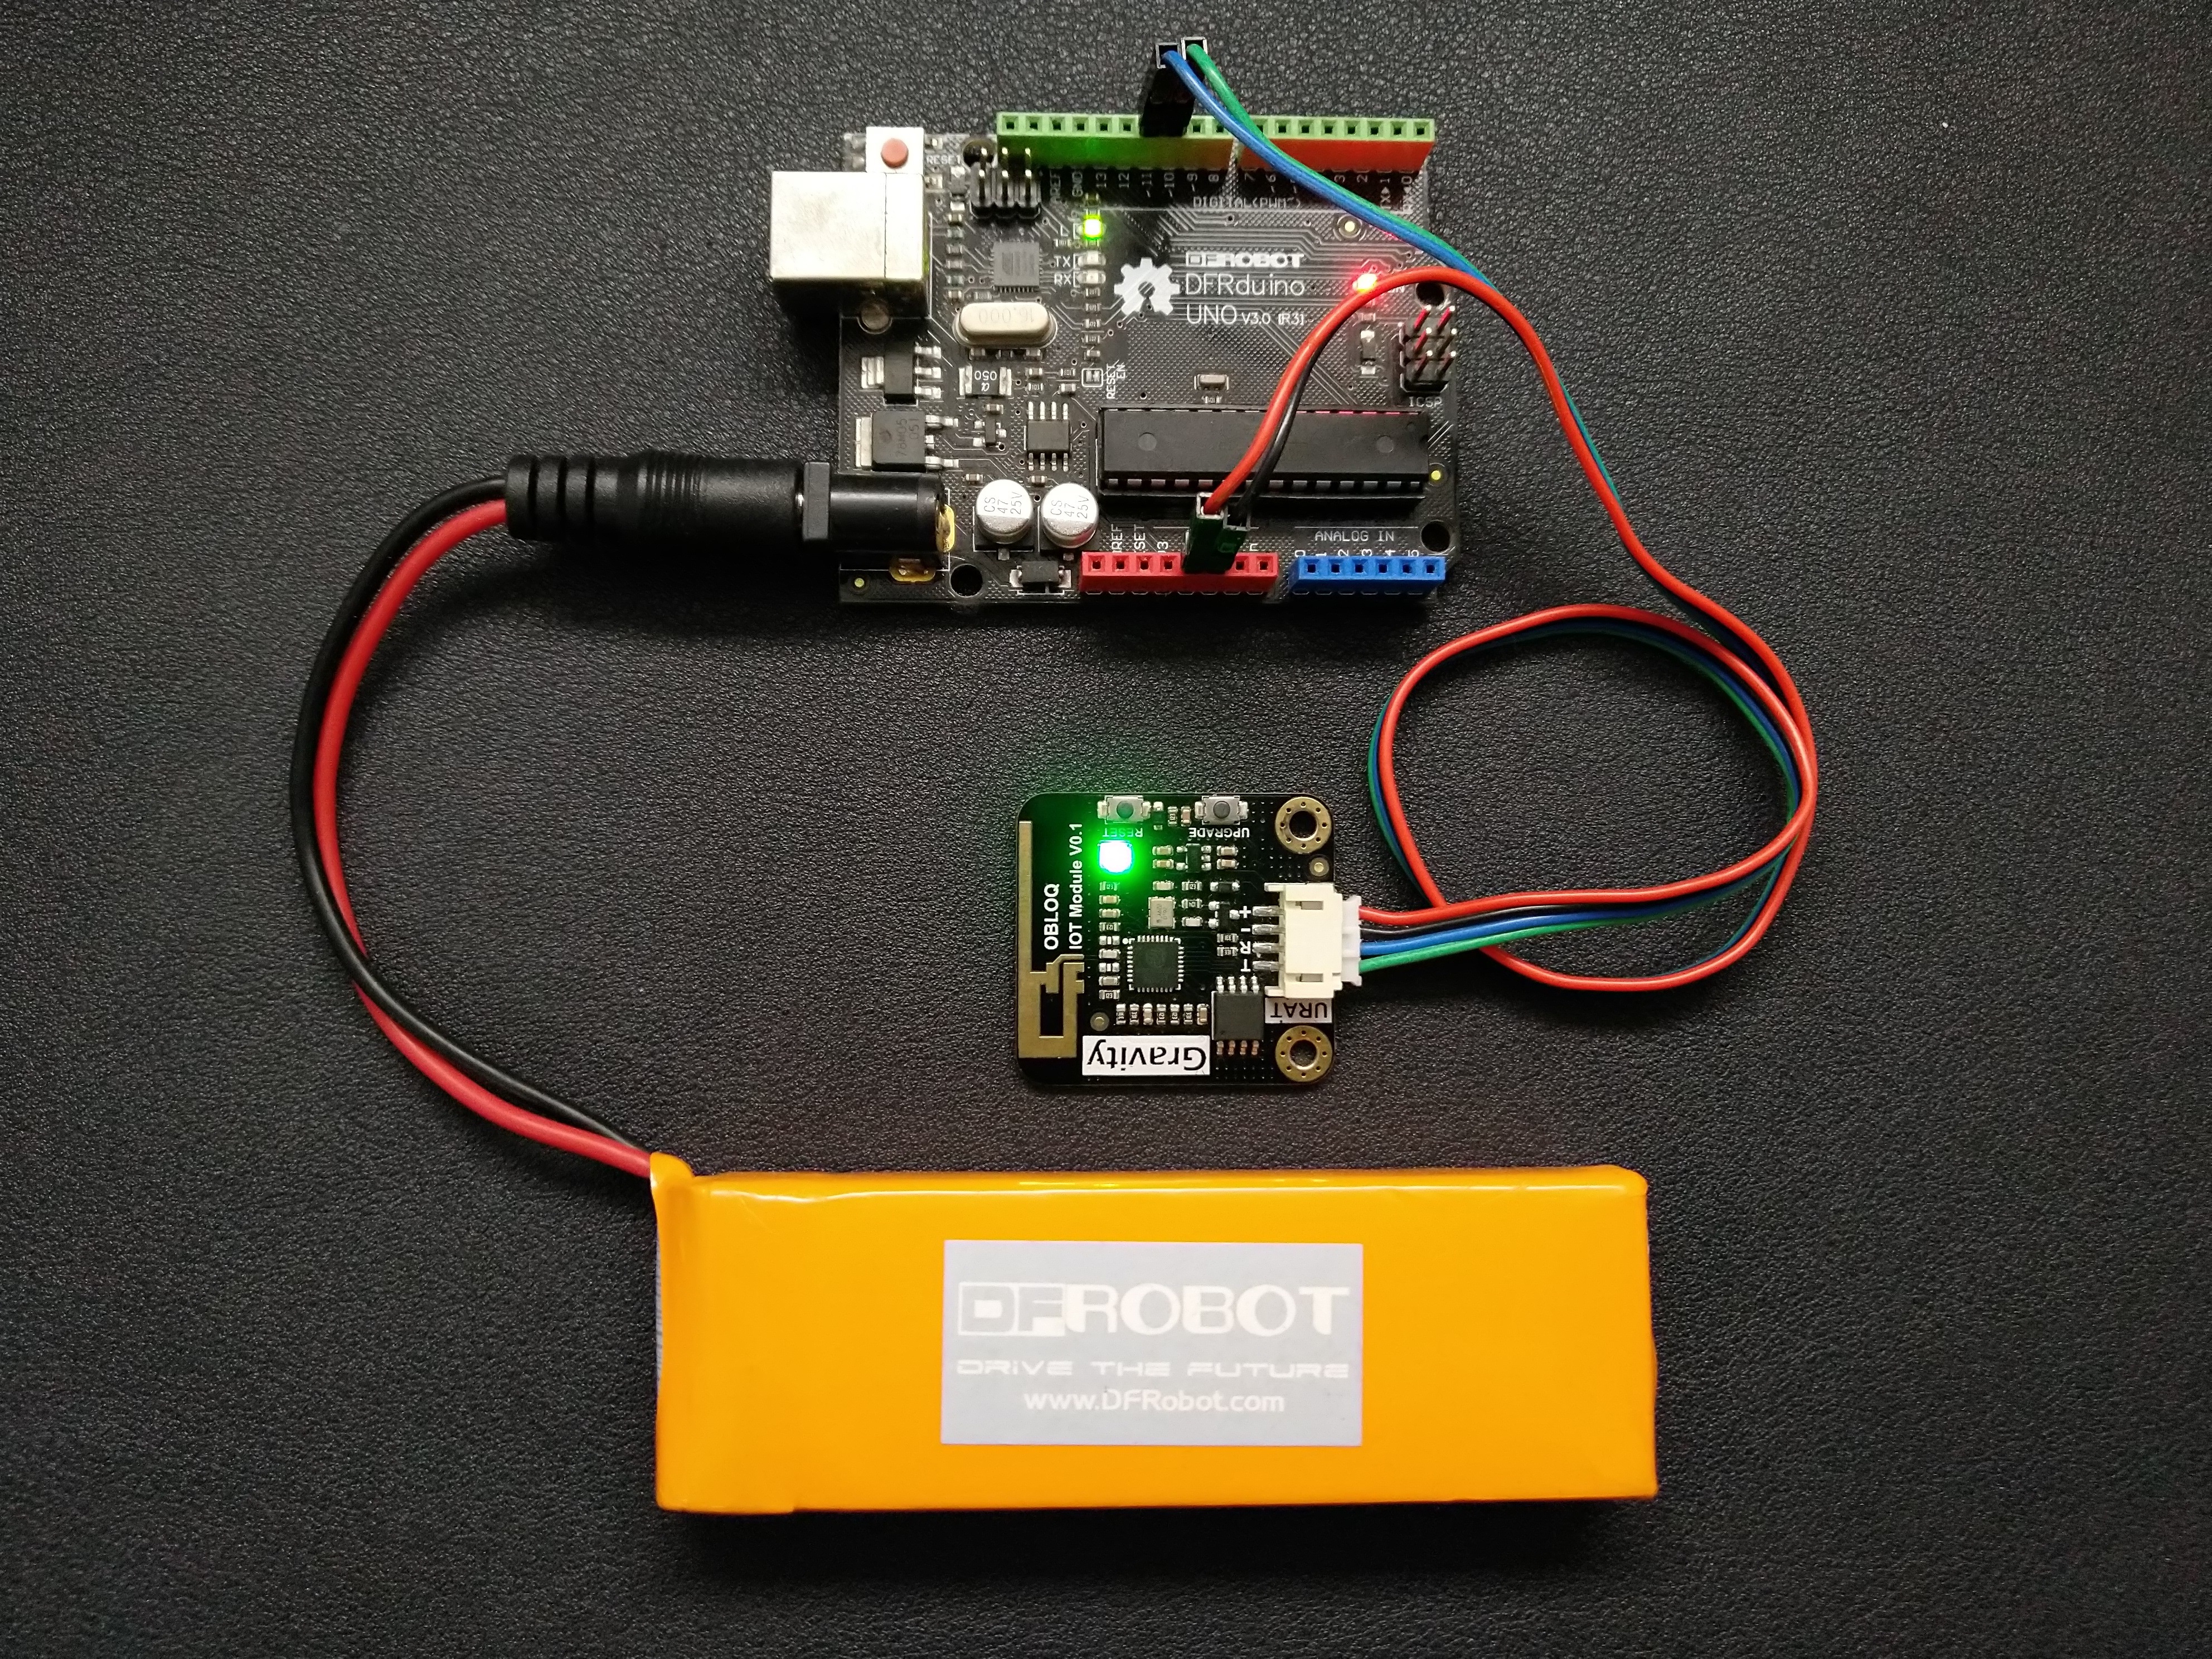
- Send number "1" to this device. The LED (pin 13) on Arduino UNO will be turned on. Send number "2", it will be turned off.
Before sending any message, the LED (pin 13) on Arduino UNO is off.
Sending number "1", the LED will be turned on.
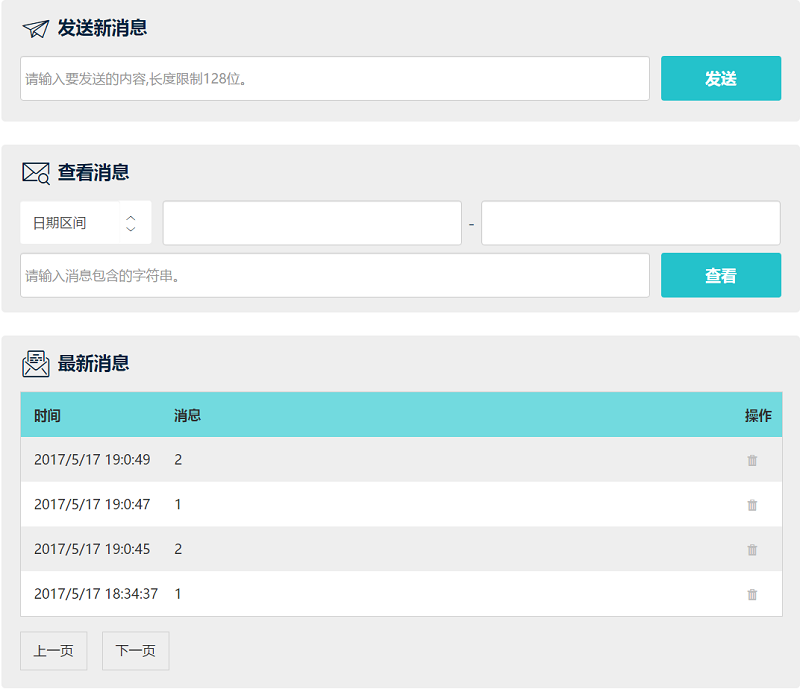
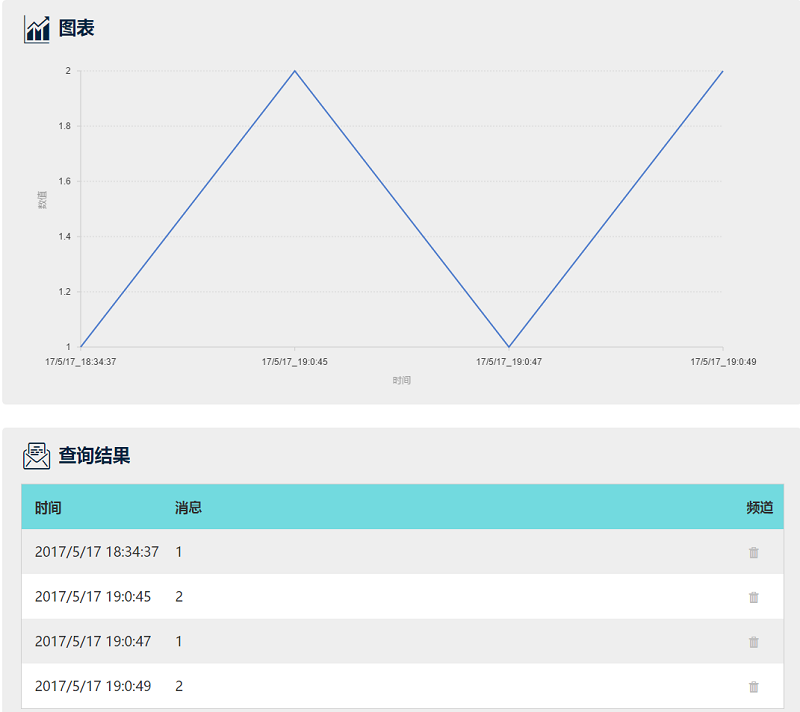
Let's see on IoT website, in the middle of "My device" webpage, there is a screening tool -- Check message. Here if we select "Date range -- 1 Day" and click "check", we can get the screening result of the exchanged messages of today. System will automatically generate a visualized data diagram.
If you do not get the above results, check if something goes wrong in below steps.
- The wifi SSID, wifi password, server, port, iot id, iot pwd, topic are correct.
- Connections between devices are correct. You may check twice if the pins using in hardware matches those in arduino UNO program.
- When OBLOQ signal light keeps showing red, or purple, please restart OBLOQ, then restart Arduino UNO. Wait until OBLOQ connected to DF-IoT.